Git is open source and distributed version control management system
- designed to handle simple and advanced projects
- speed
- efficiency
- easy to learn
why version control?
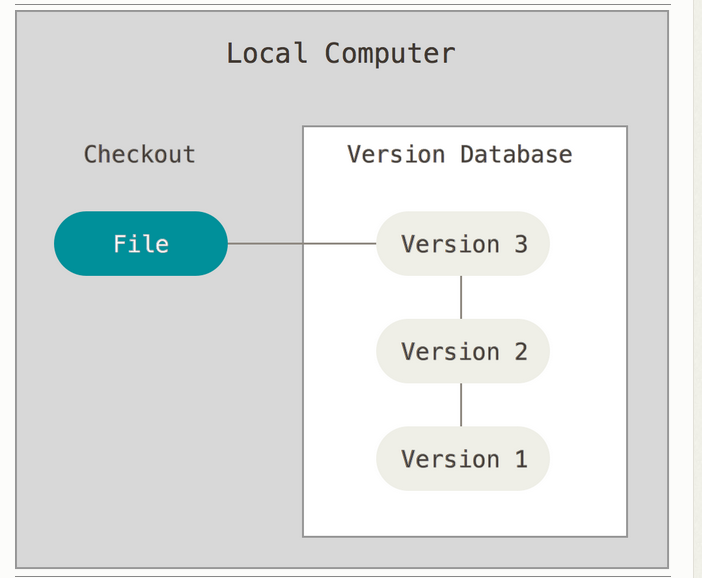
simply version control is able to track each changes to a file during a project life time. there are many ways to understand the version control. for simplicity we only follow the principle of simple and light. Git provides a centralised version control system mechanism.
Git integrity
Git employs a mechanism of utilising the SHA algorithm for check ins. we don’t need to bother about check in ; we deal about that in next chapters. there is no case of duplication in a check ins.
Why Git???
- able to track our code
- save our code to remote place
- retrieve the code
- language independent
- update of code is easy
Git Three states
Git has three main states that your files can reside in: committed, modified, and staged. Committed means that the data is safely stored in your local database. Modified means that you have changed the file but have not committed it to your database yet. Staged means that you have marked a modified file in its current version to go into your next commit snapshot.
The Git directory is where Git stores the metadata and object database for your project. This is the most important part of Git, and it is what is copied when you clone a repository from another computer.
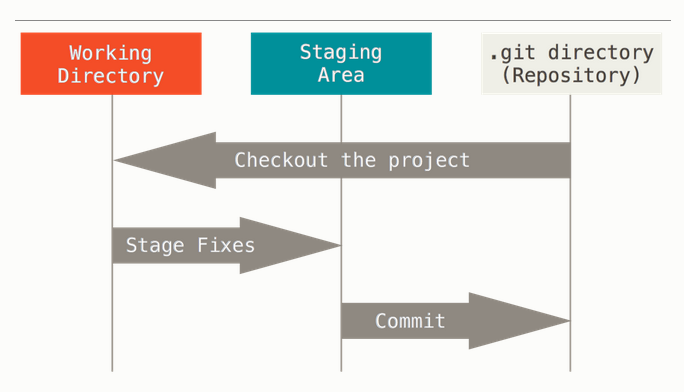
The working directory is a single checkout of one version of the project. These files are pulled out of the compressed database in the Git directory and placed on disk for you to use or modify.
The staging area is a file, generally contained in your Git directory, that stores information about what will go into your next commit. It’s sometimes referred to as the “index”, but it’s also common to refer to it as the staging area.
The basic Git workflow goes something like this:
- You modify files in your working directory.
- You stage the files, adding snapshots of them to your staging area.
- You do a commit, which takes the files as they are in the staging area and stores that snapshot permanently to your Git directory.
git Command Line
installing on linux:
$sudo apt-get install git-all
installing on windows:
Why Git for the last time ??
suppose think that you and your friends do a hobby project.All the source code for the project located in a thumbdrive. If your brother or sis accidentally format that. what did we do ? or you have written a code that causes all the codes go wrong and you wish to revert that code to a previous version; in that case git is a perfect tool.
Setting Up Environment:
what you need ?
1. a system.
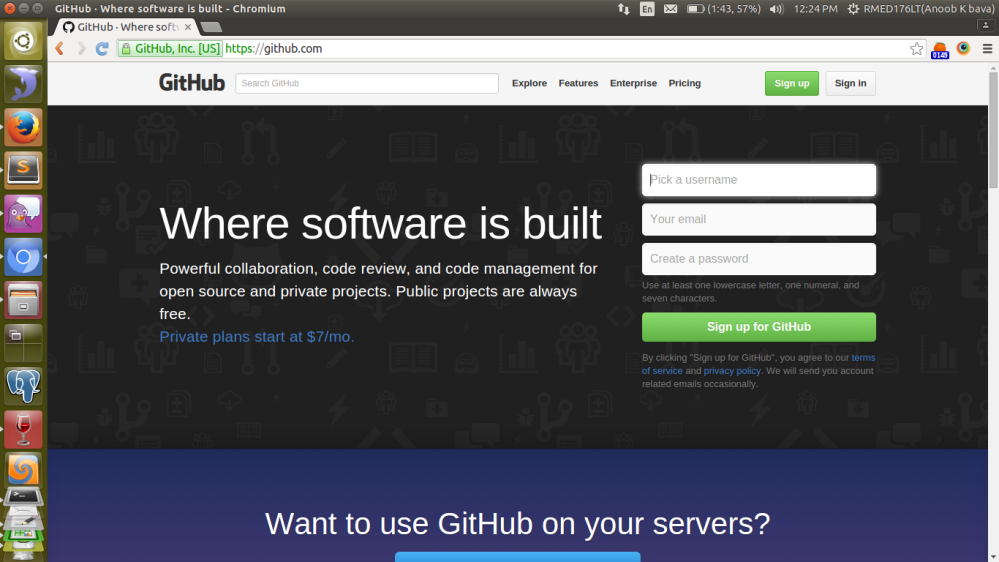
2. an account in Github( a site which manages all the git repos)–free account is available.
Here i make use of Ubuntu 11.04 ,and i will show the work
Github is a site which make use of git and we can store our code like a cloud; from there we can access the code from anywhere.
create an account in github using your email and password, it is free of course.
1.install git using the above code in Ubuntu
2.make your project folder in your path

we have now created an empty repository.currently we have to deal only with the local changes
now create a file there and try to save in git
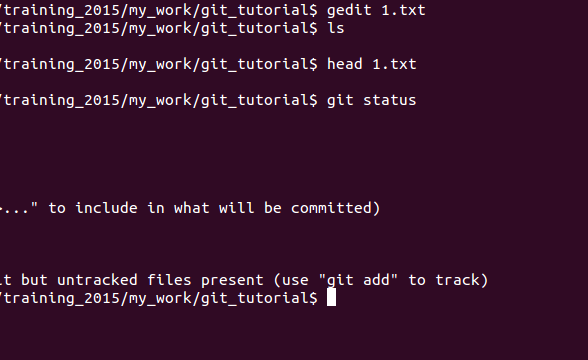
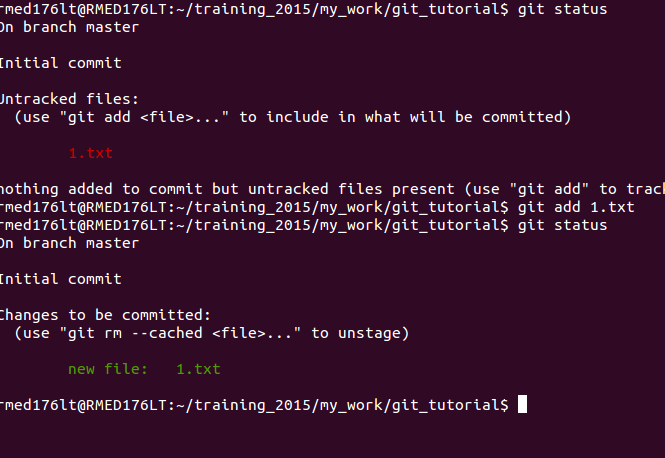
we have create a file called 1.txt and save with .txt extension. now what we do is to save the changes via git; for that we have used a command called
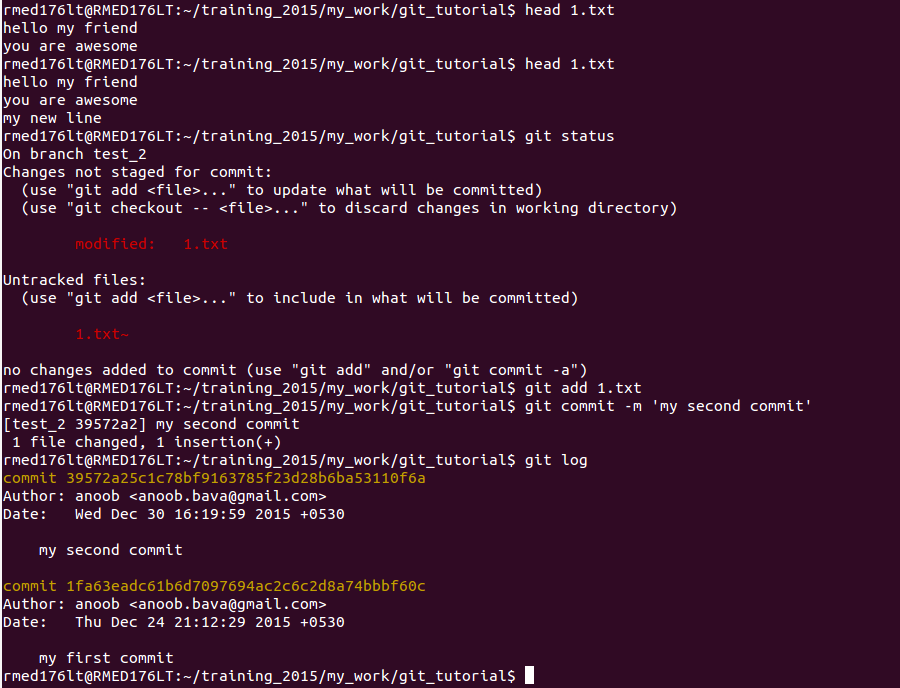
git status
which displays currently unchanged files.
we can save the local changes using the command
git add <filename>
if we need to add all the files; we don’t need to explicitly add all the files . just use the command
git add .
The files which are not saved displayed using the red colour. when you add these files then it will show in green colour;means it is tracked.
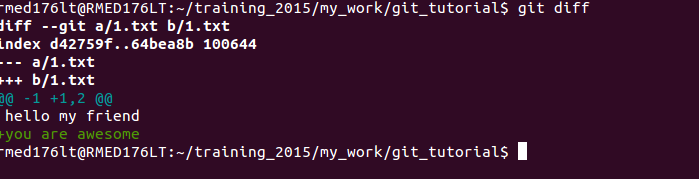
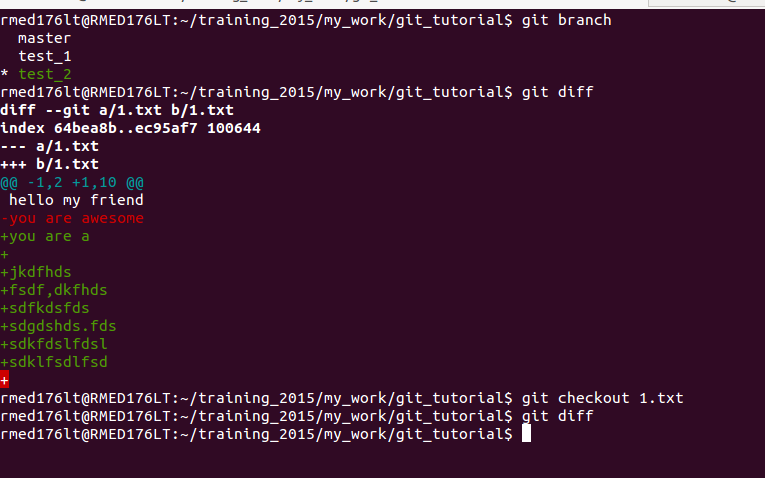
we can see difference between two files using the command
git diff <filename>
which displays the code after the last commit and currently did changes.
then we proceed to commit ,git add causes the code to staging area , when it is committed it is moved to the committed stage;then roll back is difficult.the commit operation is follows.
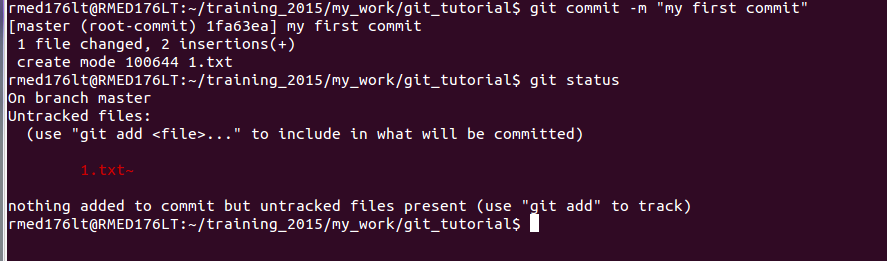
commit is done by
git commit -m “any message in meaningfull way”
-m denotes the messages operation
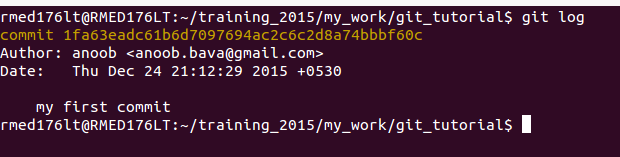
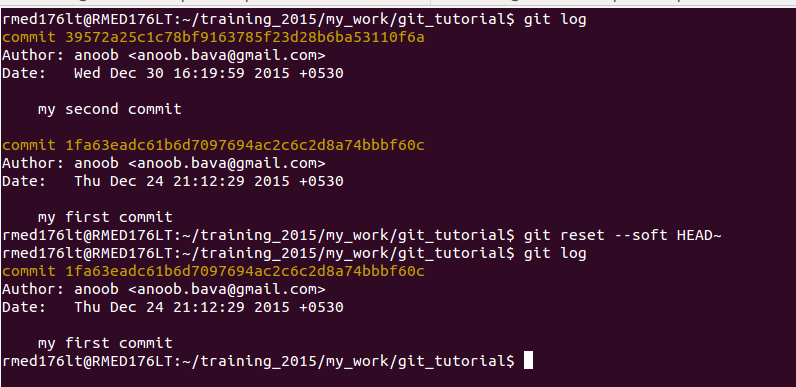
to view your commit; type
git log
what is a branch ???
suppose your are working on a project , and you wishes to do some operation in experiment way , means until now your project is good and you you want to do something without affecting your currently working code . git provides a best mechanism for doing that. normally we are always working on a branch called master in your local and you like to cut a branch from your current repo just use the command
git branch “branchname”
then to switch that branch use the code
git checkout “branchname”
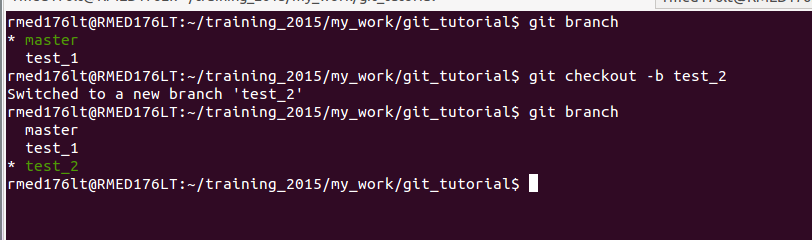
These codes can be combined to form the single code
git checkout -b “branchname”
to view your current branch
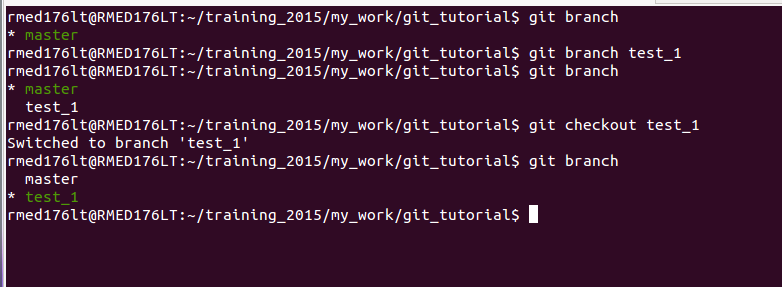
new code explained in
how to switch to previous committed version??
we are currently in a branch called test_2 and did some changes to the file called 1.txt and you wish to undo the changes in the master;just use the code git checkout filename; causes to restore the previous commit . Green colour indicates new updations and red colour indicates any deletions.
Account in GitHub
1. login in to GitHub
2.create an account if any
3.use your email-id and any password.
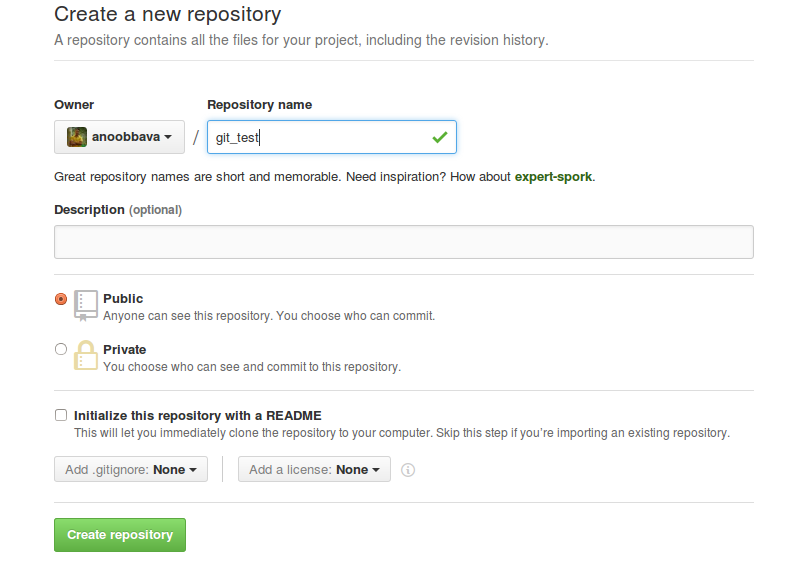
4.on the home page click on create a repo
5. type a desired name for your repo
6. save all done
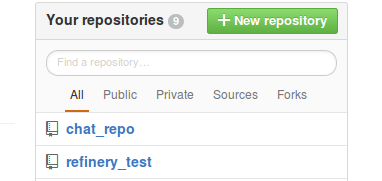
click on create repository…> ta..da… all done…
all the other operations; we did by CLI(command Line)
how to push all the codes from local repo to remote???
currently all the codes are working fine and you need to push the code to GitHub; also now you have an account in GitHub;you have a public repo in GitHub named (any name– my name git_test). By using the command git remote add
git remote add origin “git repo id”
ex: git remote add origin git@github.com:anoobbava/git_test.git
to check all working fine. if you have doubt is it ok ; type the command
git remote -v

it shows your origin ;means the remote from server.
1. on your project working directory type git branch
2. type git push origin branch name
git push origin branch name
ex: git push origin test_2
git automatically which identifies which place should that branch goes in remote .
3. type your email id
4. type your password there you go!!!
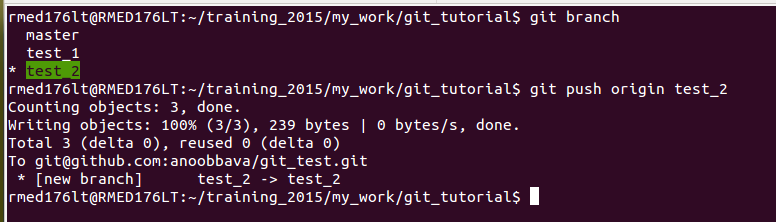
in the image there is no pop up for email id and password . The reason because i have add my SSH key to GitHub Account . i will explain that in below segments.
Cloning a project from existing repo???
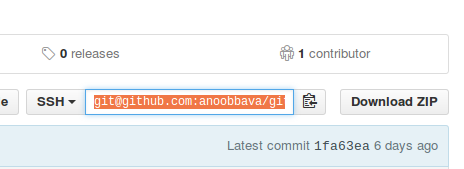
suppose we have a repo on remote and you want to clone it ( clone means there is existing project and and you wish use that project) you just click on the copy URL then type git clone URL to the working directory you wish to use.
codes are
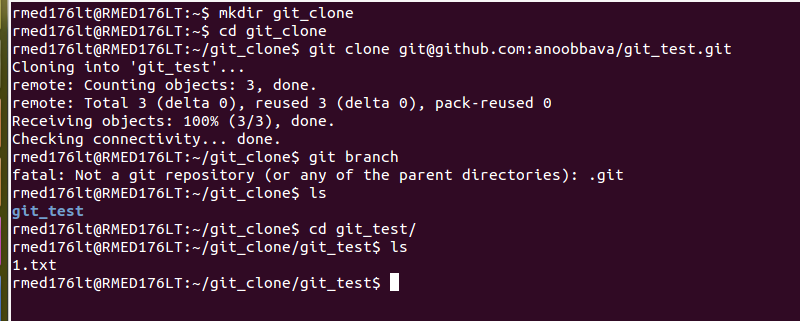
create a folder anywhere you like
git clone git repo name
EX: git clone git@github.com:anoobbava/git_test.git
Stashing:
git stash
stash is like a temporary work place . let me show the example
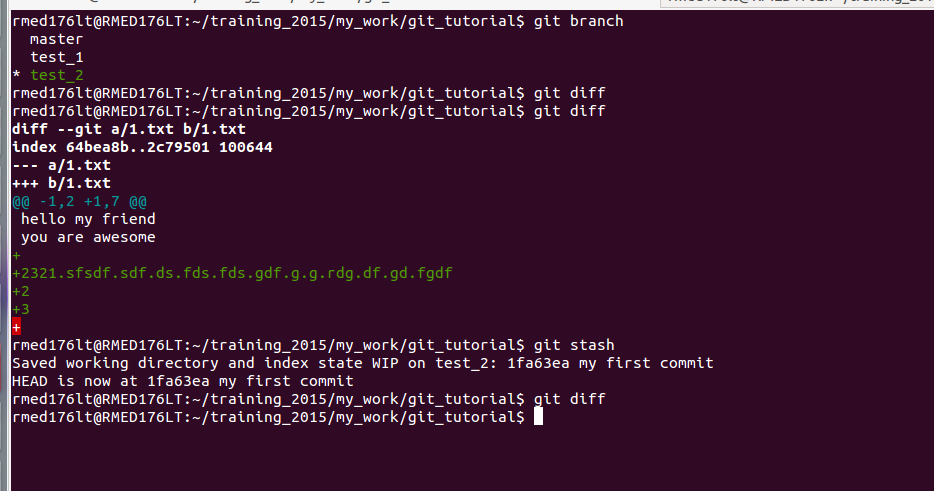
when we type
git stash
it will save the local changes to stack and reset the files to the last version. To reverse the effect what we have to do is to type
git stash apply
To view your stashes:
git stash list

to apply any stashes :
git stash apply stash name
stash is like a stack; we can pop the changes from there any time;what we need only the stash name.
ex: git stash apply stash@{0}
Undo a commit:
git reset –soft HEAD~
Conclusion : i know it is not complete. there is operation like merge and cherry pick will be there . i will update that in next blog.
image Courtesy: https://git-scm.com/
if any doubts or queries : contact
email: anoob.bava@gmail.com

hi.. tutorial is so effective.. very precise and clear
LikeLike